
How It Works
Protecting your teeth starts with a simple at-home impression. Here’s exactly what happens when you want to take custom night guards from OKi, how to take great impressions, the most common mistakes (and fixes), plus a quick FAQ.

STEP 1
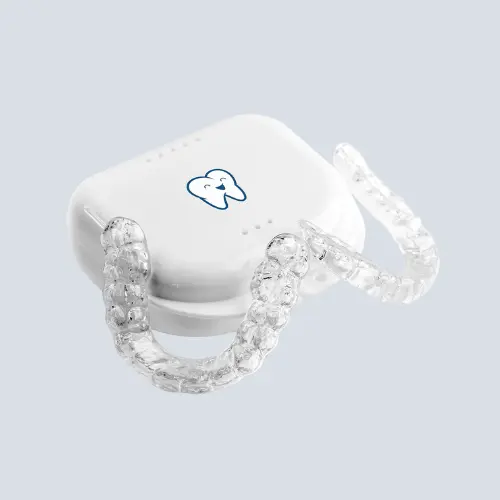
Choose your guard type (Soft / Hybrid / Hard) or a Retainer. We ship your impression kit with trays, putty, step-by-step guide, and a return mailer.
STEP 2
Mix the putty, load the tray, bite down for a few minutes, and it’s done. Detailed instructions are below with pro tips and photos references.
STEP 3
Send your impressions back to OKi. Our lab fabricates, finishes, and ships your clear, comfortable, custom night guard.

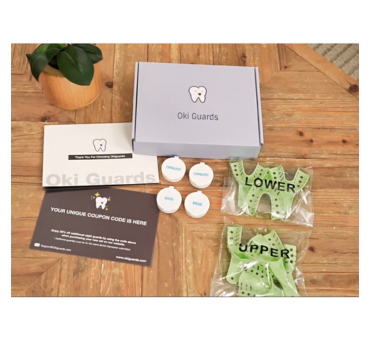
What’s in the OKi Box
- Upper and/or lower impression trays (size-matched)
- Two-part impression putty (Base + Catalyst)
- Printed instructions (QR to video, if provided)
- Return mailer and bag for impressions
- Fit card (notes you can add for tight spots, gag reflex, etc.)
Instructions for Taking Teeth Impressions
A. Preparation
- Brush & rinse gently, no food debris. Dry your teeth with a tissue.
- Try in the empty tray (no putty) to check size and orientation.
- Set a timer on your phone for accuracy.
- Things must be in front of you: base putty, catalyst putty, tray, mirror, tissues, and the return bag.
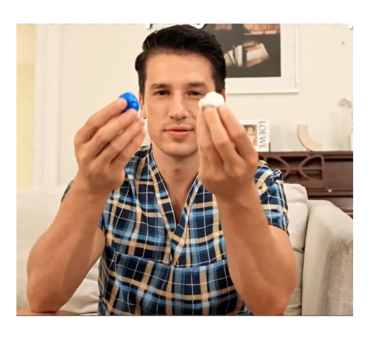
B. Mixing (45 sec)
- Dry your hands.
- Combine equal parts blue and white putty (Base + Catalyst).
- Knead quickly until the color homogenize.
- Roll into a smooth log, then a U-shape matching the tray.
- If the mix starts to feel warm or firmer, you’re near the end.
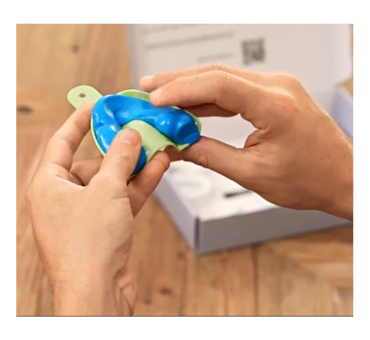
C. Load the tray
- Place the U-shaped putty in the tray, slightly thicker over the front teeth.
- Smooth the surface so there are no gaps or thin areas.
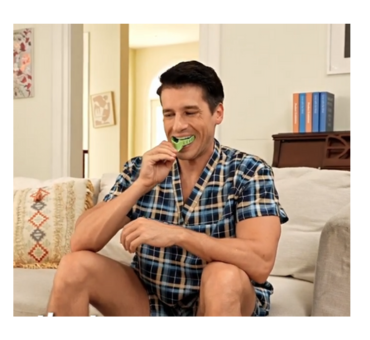
D. Set the tray (3–4 minutes set time)
- Center the tray with a mirror.
- Fit over the teeth in one firm motion, don’t rock side to side.
- For the upper: lift your lip to release trapped air and press the tray’s rim gently upward instad of biting downward.
For the lower: lift your tongue slightly and press tray down gently. - Hold steady with light finger pressure while the putty sets (no chewing/talking).
- Don’t remove early. Use your timer.
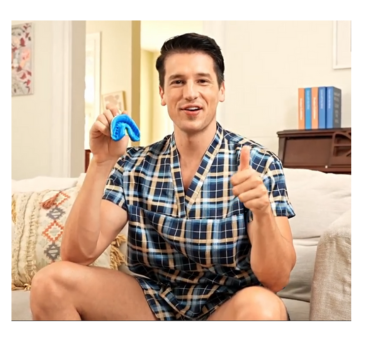
E. Remove & inspect
- Remove the tray by gently wiggling the handle straight down/up, not twisting.
- Rinse the impression under cool water for a second.
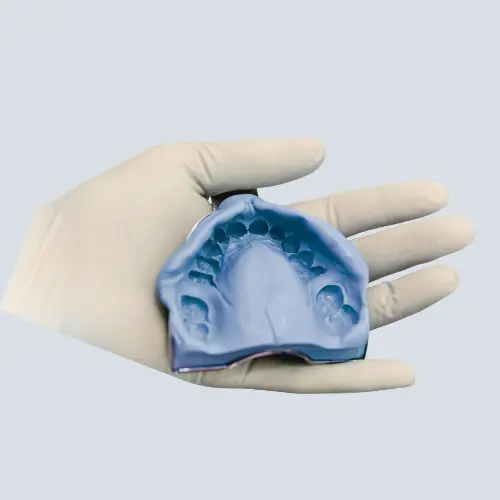
- Inspect: You should see full tooth shapes and gumline around them, with no through-holes.
- Send pic of impression to Oki support team and wait for their confirmation.
- Repeat for other arch if required.
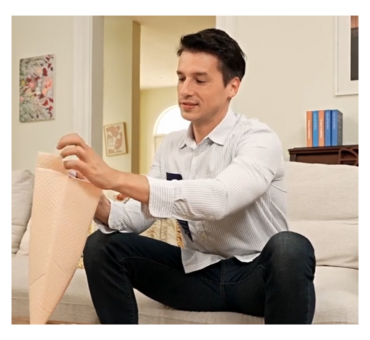
G. Pack & return
- Place the hardened impression(s) in the labeled bag.
- Fill the fit card
- Seal in the return mailer and send back.
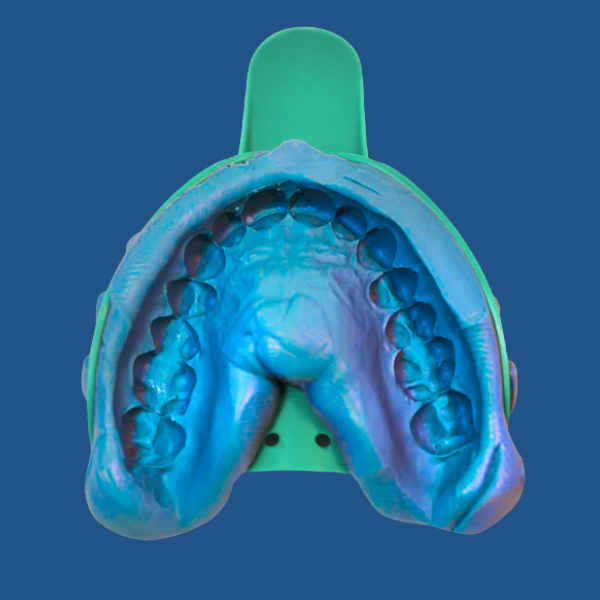
How a Good Impression Looks Like
- Sharp tooth shapes, you can see the peaks of molars clearly.
- Impression extends slightly past the gumline.
- No holes, tears, or thin spots.
- Impression should be centered, front teeth are not cut off, and back molars captured.
If unsure, take a clear photo and contact support before mailing; one quick check can save days.

Common Mistakes & Quick Fixes
- Removed too early (putty still soft):
Fix: Remake. Let it set the full time (3–4 min). Use a timer; don’t talk/chew. - Front teeth cut off:
Fix: Practice dry run in the mirror first. When seating, watch midline and press straight. - Shallow impression (not past gumline):
Fix: Use a tad more putty and seat the tray a little deeper with lip lift/tongue lift. - Holes or thin spots:
Fix: Use all the putty; even thickness; don’t scrape the bottom of the tray while biting. - Rocking motion while seating:
Fix: One smooth push. Stabilize with both index fingers; avoid side-to-side. - Gag reflex:
Fix: Lean forward slightly, breathe through your nose, focus eyes on one spot, consider trying the lower arch first if allowed. - Putty set before seating:
Fix: Work faster. Pre-stage everything, knead briskly (≤45 sec), load immediately. - Excess saliva pooling:
Fix: Tissue-dry teeth before seating; keep lips lifted briefly to vent air/saliva.
Pro Tips That Can Help
- A thin film of petroleum jelly on lips prevents sticking.
- Warm hands = faster set. If you need more time, cool your hands or room slightly.
- Remove lip gloss/cream that might slip the tray.
- For the upper, think “up & in—then still.” For the lower, “down & steady.”
- Keep pets away—impressions smell interesting to them!
After You Send the Impressions
- We verify detail and alignment. If anything’s off, we’ll contact you for a free remake kit (if your policy includes it).
- Once approved, we fabricate your guard, trim/polish for comfort, and ship it to you with basic care instructions.