Night Guard Fit Disputes: What Photos and Records Should You Keep?
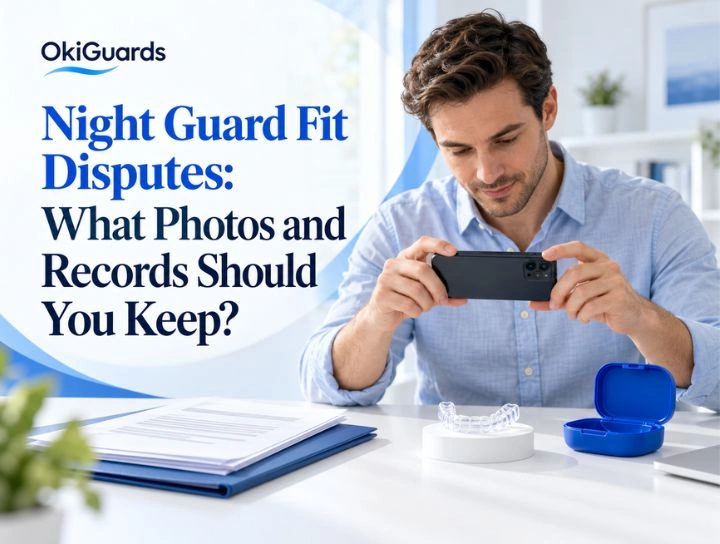
A helpful night guard fit record includes clear appliance photographs, order details, impression correspondence, and dated observations about comfort and seating. These records give your dentist and support team a useful starting point for reviewing your appliance and planning the appropriate next step. For an OkiGuards custom night guard, organized information makes it easier to explain your experience. A few well-chosen photographs and a short description can communicate more than a long, general message. Start with the essentials: identify the appliance, describe the location you want reviewed, and record when you first noticed the fit change. Then add relevant documents to complete the picture.
Put Comfortable Handling First
Gather your records in a way that keeps you comfortable. Take photographs of the appliance outside your mouth first. These views provide useful information about its shape, edges, and surfaces. Include seated photographs only when placement and removal feel comfortable.If the guard feels uncomfortable, needs adjustment, moves noticeably, or affects your bite, consult your dentist for guidance on comfortable and proper use. Keep the appliance in its current condition so the appropriate professional can evaluate it. Leave heating, trimming, filing, and reshaping to professional guidance. Photographs help explain your experience, while a dental examination assesses retention, pressure, and bite contacts.
Create a Clear Visual Record
A good photo set gives each image a specific purpose. Aim for a small collection that shows the whole appliance and the area you want reviewed. Use bright, indirect light and a plain background. Clean your camera lens and tap the appliance on the screen to bring it into focus. Take a few photographs from each useful angle, then select the clearest versions. Keep the original files and create separate copies for any arrows or annotations.
Begin With the Complete Appliance
Place the guard on a clean surface and photograph its full outline. This establishes the appliance’s identity and overall shape. Include the entire guard within the frame so the reviewer can understand the orientation. For a package containing two guards, photograph each separately. Label them consistently as “Guard A” and “Guard B,” adding the intended arch where known.
Show the Tooth-Fitting Surface
Turn the inside of the guard toward the camera. This view documents the surface that fits over your teeth. Hold the camera at an angle that captures detail through the clear material. Take one complete view and, where useful, an additional close-up. A wider image helps the reviewer understand where the close-up belongs.
Include the Biting Surface
Photograph the surface that contacts the opposing teeth. Use similar lighting to the fitting-surface photograph so the two views are easy to compare. Tilt the appliance gently to reduce reflections. This image provides a record of the surface condition at the time of your request.
Add Side Profiles
Take a photograph from each side at appliance level. Side views can help illustrate edge contours and the shape of the guard. Keep the camera steady and the appliance fully supported. If you want an edge reviewed, include a close-up and a wider photograph showing its location.
Match Each Photograph to a Question
A purposeful image set makes the support conversation easier to follow.
| Photograph | What to include | Question it helps address |
| Full appliance | Complete outline on a plain background | Which guard is being reviewed? |
| Fitting surface | Interior tooth-shaped surface | What does the inner surface look like? |
| Biting surface | Surface facing the opposing teeth | What is its current condition? |
| Side profile | Edge and contour from each side | Where is the area of interest? |
| Focused close-up | Detail plus a wider reference image | Which specific feature needs review? |
| Comfortable seated view | Accessible front or side position | How does the guard appear when placed? |
Use these as suggested views and follow any additional instructions from OkiGuards support.
Describe Tightness With Useful Detail
If you are looking for information about a night guard that feels too tight, your experience may involve pressure during placement, pressure around particular teeth, or resistance during removal. A precise description helps the reviewer understand which experience you mean. Record the arch, location, timing, and sensation in straightforward language. Describe what you have already observed and let professional assessment guide further use.
For example:
“Guard A is intended for my upper teeth.During gentle placement, I notice focused contact around the upper left back teeth. I first observed this on the delivery date and have stored the appliance for assessment.” This gives the team a location, a timeline, and a clear explanation.
Separate Placement From Removal
Explain whether you notice pressure while seating the guard, while it is seated, or while removing it. These are different observations, and recording them separately gives the clinician more useful information. If placement causes discomfort or requires extra effort, keep the appliance out and consult your dentist for guidance. Outside photographs and your written description can begin the review.
Describe Movement Clearly
For a night guard with too loose concern, focus on the movement you notice. You might describe lifting near a back tooth, rocking at one side, or coming away from the teeth as your jaw relaxes. State whether you observed this during the initial fit check or after a period of use. Add the date of any relevant dental treatment.
A focused note could read:
“Guard B is intended for my lower teeth. During the initial fit check, the right rear section showed slight movement when my jaw relaxed. I stored it in its case and contacted support for guidance.”
Your dentist can assess retention directly. Keep any demonstrations gentle, brief, and limited to comfortable handling.
Make Comfort Notes Specific
The phrase night guard uncomfortable becomes easier to assess when you explain the sensation and its location. Useful descriptions include tooth pressure, edge rubbing, tongue crowding, or jaw soreness. Choose the wording that most closely matches your experience.You can also separate visible details from sensations:
What you see: “The rear edge appears close to the gum in the attached photograph.”
What you feel: “I notice contact in that area during placement.
This distinction keeps your record factual. Your dentist can connect the description with an examination and recommend an appropriate response.
Build a Simple Timeline
A short timeline helps everyone understand the order of events. Start with delivery and the first fit observation. Add support contact, professional assessment, and any agreed service steps.
| Date or stage | Record to keep | Helpful detail |
| Delivery | Confirmation and arrival photographs | Date received and package contents |
| Initial fit check | Brief written observation | Appliance, arch, location, and sensation |
| First contact | Original support message | Date sent and attachments included |
| Dental review | Findings and instructions | Assessment date and recommended action |
| Service follow-up | Support correspondence | Agreed next step and reference number |
| Return or replacement | Tracking and confirmation | Dispatch, delivery, and relevant instructions |
These entries are a record-keeping example rather than a treatment schedule. Use your actual dates and keep the descriptions brief.
Save the Details Behind Your Custom Night Guard
Your order confirmation connects the appliance to the product you selected. Keep the product name, thickness, placement, quantity, payment receipt, and delivery information together. For a two-appliance package, note whether you chose two upper guards, two lower guards, or one upper and one lower. If you discussed a particular requirement before ordering, save that conversation alongside the confirmation. Include the relevant message when support asks for background. This helps the team compare your requested configuration with the production and service records.
Give Each Appliance a Consistent Name
Use the same labels in photographs, notes, and emails. For example, “Guard A—Upper” is easy to recognize across several files. A consistent label helps support distinguish two appliances even when they look similar. Add the label to filenames rather than marking the appliance itself.
Keep Your Impression Correspondence
Impression records provide background about the information submitted for fabrication. The OkiGuards impression guide asks customers to send a photograph of the impression and wait for support confirmation before mailing. Save the submitted images and the response. Identify the upper and lower impressions clearly. If you completed more than one attempt, note which impression was returned for fabrication. Keep any instructions about revised photographs or additional records. This correspondence documents the preparation stage. The finished guard receives its own fit assessment based on how it seats and functions.
Add Relevant Dental Information
A short dental history can help place the fit observation in context. Include relevant treatment completed after the impression, such as a crown, filling, extraction, or orthodontic change. Your dentist can identify which details matter to the appliance review. Share those relevant details through the requested channel. If your dentist examines the guard, ask for a concise summary of findings and recommendations. A useful summary may describe seating, retention, pressure location, bite contacts, and the suggested next step. Keep the wording accurate when passing it to support.
Organize Files for Easy Review
Create one folder for the order and use descriptive filenames.
A simple arrangement could include:
- Order confirmation.
- Impression photographs.
- Impression correspondence.
- Delivery records.
- Guard A photograph.
- Guard B photographs.
- Fit observations.
- Dental findings.
- Support replies.
- Return or replacement tracking.
Include dates where helpful. A filename such as “October-16-Guard-A-inner-view” makes an attachment easy to identify. Keep full-resolution originals in the folder. Share the files requested for the review and retain the complete collection for your reference.
Send One Focused Support Message
A useful message gives support enough information to understand the request and explain the next step. Start with the order number and identify the product. Follow with your observation, current status, and attachment list.
Message You Can Adapt
Subject: Night Guard Fit Review—Order [Number]
Hello OkiGuards Team,
I would appreciate a fit review for my custom night guard.
Order number: [Number]
Product and thickness: [Details]
Appliance and arch: [Guard A or B; upper or lower]
Delivery date: [Date]
During [gentle placement or another observed activity], I noticed [specific sensation or movement] around [location]. I first observed this on [date].
The appliance is currently [stored for assessment or being managed according to my dentist’s instructions].
I have attached [photographs, relevant order details, and any available dental findings].
Please let me know which additional information would help and explain the available assessment or service steps.
Thank you,
[Name]
Use the OkiGuards contact page
Understand Who Helps With Each Question
Clear roles make the review more productive. Your dentist assesses clinical fit, tooth and gum health, bite contacts, and symptoms. OkiGuards support explains order details, production requirements, requested documentation, and applicable service arrangements. Share relevant findings between the two when appropriate. For example, a dentist’s written observation can help explain the area you want the laboratory to review. Ask for specific instructions about the next step and keep the response with your records.
Review the Applicable Service Terms
The OkiGuards refund policy describes a 60-day return period from receipt and one free adjustment or remake for fit issues where needed. It also explains conditions involving impressions, product care, used impression kits, return delivery, and refund processing. Ask support how those terms apply to your order. Confirm the relevant deadline, required information, and any approved return arrangements. Your documentation helps explain the experience, while the circumstances and applicable terms determine the service outcome.
Preserve the Record During a Return or Remake
Follow the instructions supplied for your particular case. Confirm the destination, required contents, packaging, and reference number before sending anything. Photograph the appliance’s current condition and keep a packing record. Save the shipping receipt, tracking number, and delivery confirmation. If a professional has adjusted the appliance, record who performed the work and when. Share that information so the team can assess its present condition accurately. For a replacement, retain the new delivery details and instructions alongside the original case.
Frequently Asked Questions
Can I use my phone camera?
Yes, clear and focused photos from your phone are a good starting point. Keep the original-quality images available.
What is the best background?
Use a clean, plain background with indirect lighting so the appliance is clearly visible.
Should I add arrows?
Yes, you can add arrows to copies of your photos, but keep the original images unchanged.
Is a video useful?
Ask the support team if a short video would be helpful. Show only normal and comfortable handling of the appliance.
What if placement hurts?
Stop using the appliance and seek dental guidance. You can start by sharing external photos and written observations.
Can photos confirm the cause?
Photos show visible details, but clinical findings and production records help assess the cause.
Should I document both guards?
Yes, label each appliance separately to keep its photos and observations organized.
Which records should I send first?
Start with your order number, delivery date, a brief description of the issue, and the clearest relevant photos.

Final note
Photograph the appliance, describe your actual experience, and connect the observation with dates and order information. Add relevant impression correspondence and professional findings where available. Contact OkiGuards for Fit Support with the details ready. Clear communication gives the review a practical starting point, while professional assessment guides comfortable and appropriate appliance use.